Monday, March 11, 2019

Green Saviours

Belgaum is a beautiful place. We abut the Western Ghats. The conservation of the Western Ghats is paramount to the world ecosystem.


We were living our own mundane lives in this beautiful city we call home. Going through the same old daily grind. Then one day something popped up on a social media site that caught our attention. There it was - a small group of people who call themselves "Green Saviours". 
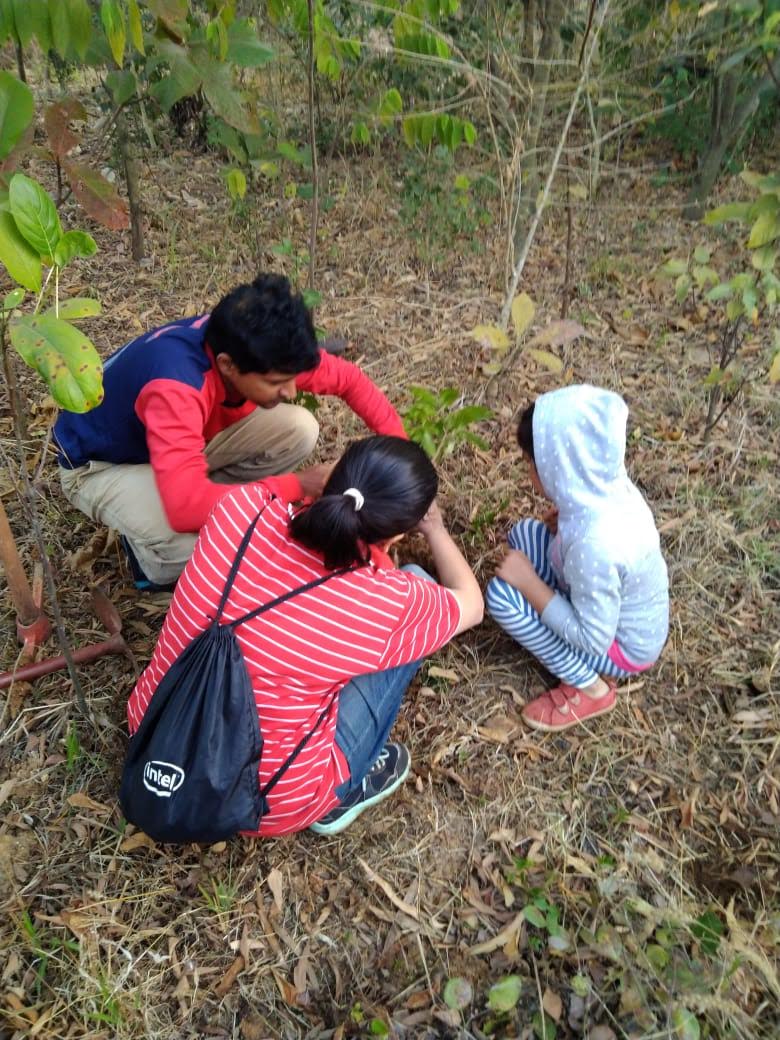
So one fine monsoon Sunday about 10 months ago, we decided to join them for a afforestation drive. From the moment we sat in the bus to go to the site to the moment we got back, our experience was inimitable! The bus was full of people ranging from children to college going youngsters to retired old souls and everyone in between. The air was welcoming and their reception was like being enveloped in a warm cocoon. We were to plant trees at Chikhale, right on the Ghats. 
It was peak monsoons and the rain didn't deter a soul. The terrain itself was arduous and involved a massive walk to reach the plantation site! Probably one of the best Sundays we ever spent! I was alone with a child and the whole group helped and welcomed the little one with such vigour! They helped carry her when the going got tough and held her hand when things were slippery. This small group of volunteers were just blowing us away. However, it was not just all work and no play, they literally had us in splits with the fun and dancing in the bus on the way back home after a hard day's work! These folks know how to savour every joyous moment in life! 


And hence our journey with the Green Saviours started. They have been tenaciously playing their part in the afforestation since the last 152 consecutive Sundays! Their uniqueness lies in the fact that they not just plant trees but actively maintain all planted sites. Also they are pioneering with new environmental techniques like the miyawaki afforestation method


The Miyawaki method is very potent! We plant native and indigenous species of trees and shrubs in a very small piece of land. Trying to mimic the natural forest environment. All trees are planted close to each other. This helps with what we call as "canopy wars". The plants compete with each other for nutrition and light and consequently grow taller and faster in an accelerated fashion. Scientific, practically proven to work and very effective indeed!

We are creating magic! 


This post is completely dedicated to the group of volunteers that are making a difference. The number of full time employees of Green Saviours is zero! Each and every person volunteers and joins because they believe they can make a difference. Please follow our journey -

Here is another 15 year old trying to make a big difference - 


Video credits to goalcast

I hope you watch the video above. It is profound beyond words. We have only this one planet. ONE.
Every one of us can make a difference, even in our own small ways. As poignantly put forth by the gods - Pink Floyd

And then one day you find ten years have got behind you
No one told you when to run, you missed the starting gun


Wednesday, February 13, 2019

Discovering Handloom


My family deliberately tries to live a slow life. It's a conscious decision that helps us savour the small things.

In the past few months I have a new found and profound respect for all things handloom. How did it start? Well for starters I am a flower child at heart with a deep sense for conserving my planet.

Do we ever stop to think why fashion is so hard to keep up with? Fashion today is just driven by corporations trying to maximize their profit. If one makes a garment that lasts years then why would a consumer buy more? This is what drives this industry today. Most fast fashion brands are interested in fast changing fashion trends that lets them mass produce clothes. Maximising profits is the goal. How do they achieve that? Either by making sub par garments that are low on quality (that only last a short duration so that the consumer needs to constantly buy more) or get your garments made at sweat shops( with little or no care for worker safety or fair wages) or both! So if I buy any such fast fashion garments it bears down on my conscious more and more.
84% of unwanted clothes worldwide end up in landfills! My conscious seriously suffers. I wear most of my clothes until their demise and then like a good old classic Indian reuse them for household purposes. But I wonder often if thats the 80's child in me hanging onto my middle class upbringing, would a millennial do the same?

So I consciously decided to slow down even my clothing. This is where my new found interest in handloom peaked. Additionally my new found appreciation for handloom sarees ( whole another story that led me to wear sarees much more frequently, will add another post to explain that reason) . I am fortunate to live in a country that has such a rich fabric heritage. There is a sea of varieties of handloom art in India! I need to take pride in this heritage and do my part in being a part of this movement. Slow fashion - is sustainable clothing made using sustainable indigenous materials and made by hand by our talented weavers. If I spend my money on a saree it should be for a quality product and should pay the weaver who deserves the credit.

Gamcha saree

In the age of social media everything becomes a fad! There is a huge handloom bubble online! Sometimes I worry about the authenticity and whether even this is becoming a fast fashion-esque trend! Every other day it's tussar week or kantha stitch saree week. And as humans we love to keep up with the Joneses! Do I really need a saree from each and every region of this vast country? Do I need to "follow" as sheep! I ask myself this question often - am I buying this saree because I love it or because I want to create a collection! Am I aiming to set up a museum?! Can anyone possibly wear 100 or 200 or more sarees? Do you cherish and love all those sarees? Is there a story to tell behind each garment that I own? Do we really need so many?

Paithani saree


I buy when I love something ( in the words of the queen Marie Kondo - when something truly sparks joy). When there is story to tell... "Oh I got this saree on my trip to Kerala, we found this quaint  little shop.." Or " this saree belongs to my Nani she wore it during her wedding, I cherish it so much"!
If I have a story to tell then I truly cherish it! I know when I wear that saree that it would look radiant on me!

Leheriya saree

I would love to understand and assimilate any knowledge I can about the art of the weave that I am planning to buy or have. This is how I can keep up the rich tradition of this craft.

So, do I get tempted to buy even slow fashion garments due to this insidious social media pressure? Yes, I am human. But I have also developed a sense of questioning. Do I love it? Will I cherish it? Does it tell a story? Is this saree an heirloom? Does it spark joy? Is it sustainably made?! I think it's important to question.

Khesh cotton saree

Consumerism (even in slow fashion) will not lead to happiness. In fact most scientific research done apropos happiness proves this consistently! Having things does not make you happy. It's a vicious cycle, you would keep wanting more and more! The key is moderation and contentment.

With my new found interest I often get asked now, where do I buy genuine handloom products? I have come to trust a few sellers over time and do believe in their commitment to this movement. But a wise soul recently reminded me of the power of simplicity. Buy how your grandmother bought her sarees- when you go on a trip buy one locally from a weaver as a souvenir, or buy to add to your child's wedding trousseau, or buy to commemorate occasions.


Goan Kunbi saree

The idea is to be mindful. Slow fashion is the way to go. Be sustainable and be contended!


Thursday, April 27, 2017

Pasta Stuffed Calzone

Has it been forever? It has!
Let me wake up from my slumber and give you a sneak peek into my life this past year. It's not that I have not been busy. I sewed a bunch of clothes, read a few books(follow me on goodreads) and tried many a marvellous recipes. But as usual I have been too lazy to blog! Sorry about that!

I have also taken up a new hobby - gardening. Our terrace garden is looking damn neat! May be I will put up a full post on my gardening adventures.

Apart from that here is something we tried today morning for breakfast - Pasta stuffed Calzone.
This recipe makes about 10 calzones.


Dough

2 cups whole wheat flour
1 tbspn extra virgin olive oil
6 tspn sugar
1 tspn salt
1 tbspn dry active yeast
Warm water to knead

In some luke warm (not hot!) water add 2 teaspoons of sugar and dissolve. Add the yeast to this mixture and set aside for 2 minutes. The yeast with activate and bubble. Add the remaining sugar, salt and oil to the flour. Make a well in the center of the  flour mixture and add the yeast slurry. Knead with warm water to make a soft dough. Knead well for at least 10 minutes to activate the gluten in the dough. The dough should be soft and should spring back if touched. Set aside this dough with a wet kitchen towel on top for about 1 hour in a draft free warm place. Let the dough proof till it doubles in size.

Pasta Stuffing

2 tbspn extra virgin olive oil
10 cloves of garlic
1 large onion
1 green capsicum
4 tomatoes pureed
1 tspn oregano
1 tspn chilli flakes
1 tspn sugar
1 tbspn tomato ketchup
salt to taste
1/2 cup boiled pasta(I used macaroni)
few slices of black olives

Heat the olive oil in a pan, add the finely chopped garlic. Purée the onion and capsicum and add it to the pan. Let it cook out for 5 minutes. Add the purée of tomatoes, cover and cook till most of the water evaporates. Add a dash of oregano, chilli flakes, sugar, salt. Add a little bit of ketchup to balance out the taste. This sauce is my default marinara that I use on my pizza's.
Add sliced olives and cooked pasta to the sauce and keep aside.

Caramelized Onion and Capsicum

1 tspn extra virgin olive oil
1 large onion
1 red capsicum
1 yellow capsicum
1 tspn sugar
salt to taste

Cut the onion and capsicum into thin slivers. Heat oil in a pan and add the onion. Add some sugar and let it caramelize. Add the capsicums and caramelize till slightly brown. Add a pinch of salt to taste.

Other Stuffing Ingredients

Mozzarella cheese
Basil leaves

Assembly

Image Source - thekitchn.com

Take a small ball of dough and roll it into a circular form(like chapati). Add the pasta stuffing to one side of the semi circle. Add the caramelized onion and capsicum. Add some mozzarella cheese and a few leaves of basil. Drizzle with a little bit of olive oil. Now flip over the other half of the semi circle over this half with stuffing into a half moon shape( just like karanji or gunjiya). Crimp the edges of the calzone to shut them well.

Place them on an oiled baking tray and let them proof for another 15 minutes.
Drizzle some olive oil on top.

Preheat oven to 200C and place them to bake for about 20-25 minutes or until golden brown.


Enjoy!


Saturday, April 2, 2016

Sleepover Pajamas

Let me tell you what I have been doing - I have sewn a bunch of clothes, read a few books, thrown a few parties, tried a few new recipes (infact I am devouring some home-made chocolate mint icecream as I write this post!).... Let me tell you what I have not been doing - blogging!

Apologies are in order. Let me start by posting about the sleepover pajamas. I sewed these up last December.


I finished these pretty quickly. As usual nothing can go wrong with Oliver+S!

Where I got stuck with this project was the button holes! It's just that I am such a sloth! So I stashed this new piece away for a later time. Come February, I realized that I had still not done the button holes on this one, so finally the auspicious moment arrived and I finally finished the button holes!

Wait, its not done yet. I stashed this piece away again. I still had to sew on the buttons!! So here I am at the beginning of April, finally putting on the buttons!

I asked Adrika to give it a try. Lo and behold, she's grown bigger from last December, so now I need to unfold all the cuffs to make this fit! Thankfully there are cuffs on this pattern and I can do this easily and make it work!

So if you feel the sleeves are a bit short, they are! I will open them up soon, promise ;)


Enjoy!


Tuesday, November 17, 2015

Asymmetric Neck Top

There is always a first time for everything. This is one of those firsts. First time sewing for myself.

We all have a piece of garment we love. It fits great, looks great. I had a green cotton top with a diagonal neckline that looked great. Unfortunately it got worn to death! So I thought about cloning it!

I wish I had a better "before" picture to show you.


This is also the first time I drafted a pattern for myself from an existing piece. I will try to add some photos of how I went about doing this.

First I took the top apart at all the seams. There were only 4 basic elements - sleeves, front piece, back piece, small decorative tie. It looked really simple to put together. 

Part A : Drafting the pattern

1.  For the sleeves, I opened up one of the sleeves completely and traced it out on a tracing sheet.

Here are my drafted sleeves -


Most of the seam allowances were 1/2 inch already, so the drafting was easy.

2. Next the front and back pieces -


The front and back piece were essentially the same, except for the asymmetric neckline on the front piece.


So I made a single pattern piece using the back piece for both.


Also I made some adjustments to the seam allowances where needed. Like here I added another 1/4 inch to the seam allowance at the arm hole to get a 1/2 inch seam allowance. I feel that 1/2 inch seam allowance gives me more room to finish the seams well.


Since the front and back were same sized, I didn’t want to re-trace the pattern. So I decided to just have a asymmetric neckline cut-out. Something like a 1's complement (pardon my geekiness! I can't think of a more apt way to describe this!)  piece that I can cut out to get the desired front piece.


Note that this piece is smaller by 1/4 inch to allow for the desired seam allowance at the neckline.

3. Decorative tie - There was no pattern piece required here.


Part B: Construction

1. Decorative tie -
I just measured the length and cut out a strip to 14 inches long and 1 inch wide on the bias. Then went about folding it in half with right sides together and sewing a 1/2 inch seam along the length to create a tube. Next trimmed the seam allowance to 1/4 inch. Using a loop turner I turned it out the right side. Then added the tiny bells to the ends of the tie by hand.


2. Sleeve construction -
Cut out two of the sleeve pattern pieces from the fabric. Started off by finishing the hem on the sleeve. I folded the raw edge under by 1/4 inch and again by 1/4 inch to create a narrow hem. Attached a piping to the edge.


3. Attach the front and back pieces at the shoulder seam. I used french seams for this. Also I stay stitched the front and back necklines.


4. Next attach the sleeves to the arm holes of the top. There are many tutorials online to help with this. Since its a curved seam, take time to gently gather while attaching the sleeve. Also to finish the armscye seam, I flat-felled them. They turned out quite neat.


Nearly there!


5. Side seams - This top has side slits, so I used this and this tutorial to sew the side seams.

6. Neck facing - This tutorial was excellent to understand how to do a neck facing using bias tape. Originally I had planned to do this and then attach the piping to finish the garment. However I came across this article and realised I could save a little time and effort by using the piping itself for the facing!

7. Last step attach the decorative tie to the neckline by hand.

All done!


 Enjoy!

Wednesday, September 2, 2015

Popover Sundress

The popover sundress is a free pattern from Oliver+S. Darn cute!

I made two exactly same dresses. One is for my model and the other one is for Diya for her beach holiday! It's a simple yet timeless dress.

Also this is the first time I used a modern colour combination. Something which I wouldn’t pair together normally. Navy blue and yellow just go together.


Enjoy!

Thursday, August 20, 2015

Ice Cream Top

The sewing blog world is teeming with adulation for the liberty fabric prints. And rightly so, they are delightful! Sadly, I do not know of any place in India selling liberty fabric per se. So when I came across a very 'liberty' like fabric at my local fabric store, I was enticed into parting with the hard-earned!

Here is another take on the icecream dress pattern. This is a tunic version.


The fit is cute, isn’t it!

Enjoy!